Voting
FeaturesONLINE VOTING, MADE FOR SCHOOLS
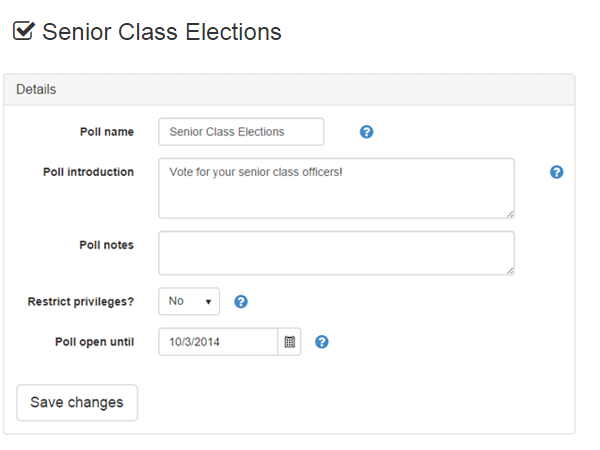
Step 1: Create the Poll
Add a new poll and choose from several configuration options. You control the voting end date and adjust as necessary at any time.
STEP 2: DESIGN YOUR QUESTIONS
Add questions to your poll and configure the choices for voting. Named choices can include any combination of:
- A name or label
- A description
- An image
- A link for more information (i.e. YouTube video, etc)
A choice can also be configured for the voter to select from a list of individuals. The list will be generated based on your selections of type, grade, gender and eligibility status.
Preview your poll questions to make sure they look just right.

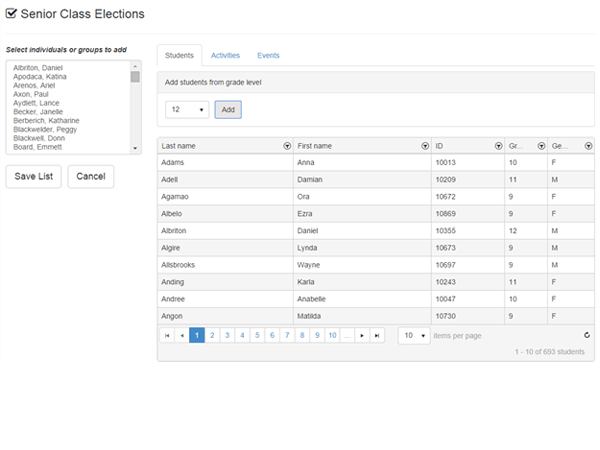
STEP 3: DISTRIBUTE THE POLL
Choose the eligible participants to vote. Participants can be selected via multiple methods:
- individually
- by class
- by activity involvement
- by event attendance
- by type (student or staff)
Email invitations to vote or create a secure, online voting link. You can choose from 7 different options to authenticate participants arriving at the online location.
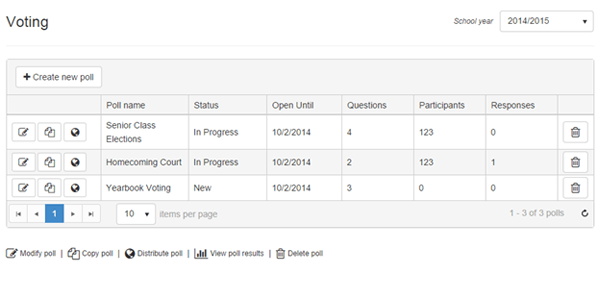
Step 4: MONITOR Voting PROGRESS
View the number of responses received after the poll has been distributed. See which participants have voted and push out the voting end date if more time is required.
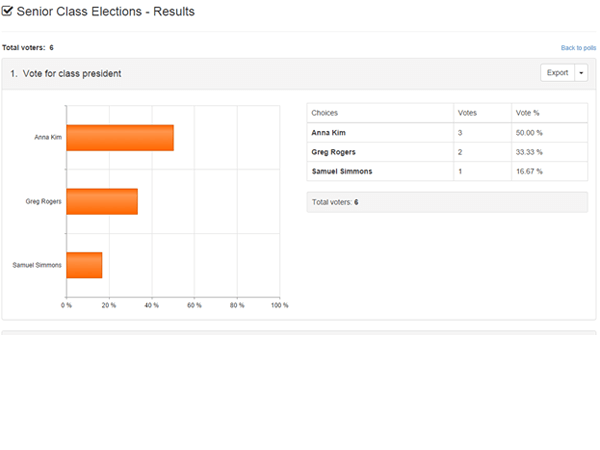
Step 5: View Results
After the poll has closed, you can view the results. See the numeric data, along with a chart for each question. For list-based choices, all individuals that received votes will be displayed. Results can be exported to PDF or Excel formats.